Archives: Communicate
Helping the Citizens of City X
I created a device for a citizen of City X using the design process to solve the problem that they had. City X is a city on a different planet that has nothing but a 3D with them. Milo, the citizen I was helping, had a problem where the sun was too hot and their sunscreen wasn’t working. First, I had to empathize, so I put myself in Milo’s shoes to see what  I would do if I were in his situation. Next, I had to define his problem. Milo’s problem was that the sun was too hot and his sunscreen wasn’t working.
 Then, I had to brainstorm or ideate to come up with some new inventions that will help Milo to not get burned by the sun. The idea I eventually decided on was a hat with an umbrella on it, that when you press a button a sun-resistant bubble forms around you. After I brainstormed, I had to draw a sketch of 3 different revisions of my idea. On the first sketch, my umbrella was too small and the hat was too big, so on the second sketch I fixed the unevenness. On my third sketch I added the bubble.

Once my sketches were done, I made clay models of the design and then started working on my Tinkercad. While I was working on my Tinkercad, I tested the prototype by asking my friends what I should change. In conclusion, I used the design process to create a new invention for a person of City X who had a problem.


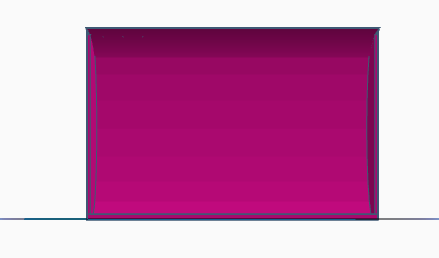
Coastal Barrier Project
In 2011, a massive tsunami with over 10 meter waves crashed down on Japan and destroyed almost all the cities along the shoreline. All the cities that were destroyed had seawalls that were less than ten meters high, except for the city of Fudai who had built their seawall 15.5 meters tall after their mayor, Kotoko Wamura, had barely survived a tsunami in 1993 and vowed to protect their city from other dangerous tsunamis. When the tsunami struck Japan in March of 2011, Fudai was the only city left standing after the tsunami had destroyed and taken all the other cities along with it. Our design challenge was to design a prototype of a coastal barrier device that will protect the shoreline from a tsunami.
The criteria for our coastal barrier include, the device should stop the water from going over the wall and it must be able to deflect any water away from the shoreline. It must also be sturdy and durable enough to withstand the waves. The device must be made out of materials offered in class and must use 3D-printed parts. Lastly, the wall must be able to withstand up to two gallons of water, the maximum that will be used in the testing area. A constraint of the design is that it has to built with 3D- printed components and materials offered in the classroom. The 2011 Japanese tsunami was caused by the Pacific and the Okhotsk plates. The Pacific and Okhotsk plates started to push against each other until eventually the Okhotsk plate snagged under the Pacific Plate. The Okhotsk plate started to bend until it eventually snapped, forcing the water to move upward causing a tsunami. To start the process of designing our wall we made a sketch of what we wanted our wall to look like from the top, side, and front views. We also included measurements in our sketch. After our sketch was approved, we started building our walls on Tinkercad. First, I put a box on my tinkercad platform and contorted it to the size I wanted my wall to be. Then, I made the curve of my seawall by using a cylinder cut-out and added an extra curve by putting an upside down ramp at the top.
There were many parts in this project that were easy, but there were some that were also challenging. For example, I found it difficult to come up with creative ideas that would differ from everybody else, but I found it surprisingly easy to learn how to use tinkercad. While it was easy to learn, tinkercad also had some difficulties. For example, it was difficult for me to maneuver the objects so that they faced the right way, lined up with each other, or were the size I wanted them to be. Despite the difficulties, once I had the base of my wall sized and built correctly, it was very easy to add extra features, like the ramp on the top that my wall more of a curve. If I could do this project again, I would change many things. I would change the height of my wall and make it taller so that it is a few centimeters shorter that the box. I would also try to find a way to make my wall more of a curve so that the wave flows back to the water.
Flower Dissection
In this lab my partners and I dissected a flower and labeled the different parts of the flower. First, we gently peeled of the sepals of the flower. Then, we peeled of the petals and the stamen. Next, we peeled off the leaf and Mrs. Conner came and cut of the stem, ovary, style, and stigma. Lastly, we labeled all the parts of the flower on a piece of paper.
Sexual reproduction in flowers takes place by the stamen making pollen. Then pollinators come and take the pollen and drop in the pistil of another flower. Fertilization occurs and the ovules grow into seeds.
